
RV Roof Inspection & Maintenance
The first step in any proper RV roof inspection is to grab a sturdy stepladder and examine the overall condition of the roof membrane, seams, vents, and sealant beads.
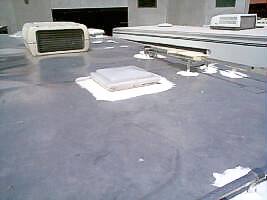
Sealant Care & Inspection Intervals
While aluminum, fiberglass, and rubber membrane materials can last for decades, the perimeter lap sealants surrounding roof openings are continuously exposed to severe UV radiation and expansion cycles. Roof sealants should be thoroughly inspected at least twice a year, as cracks or voids can develop in as little as 6 months.
Choosing the Right Sealant
- Rubber Roofs (EPDM/TPO): Always use a high-grade self-leveling lap sealant compatible with rubber membranes, such as Dicor Self-Leveling Lap Sealant. Never apply silicone or petroleum-based caulks on rubber membranes.
- Aluminum & Fiberglass Roofs: Use a fiber-reinforced roof coating or elastomeric seam sealant. Thoroughly scrape away loose, flaking old coating, wire-brush the surface clean, and wash with detergent before applying new coating.
Remember: Leaks rarely originate from the roof membrane material itself—they almost always occur at roof penetrations (plumbing vents, skylights, AC gaskets, and termination rails) where sealant has failed!
Related articles:
- RV Roof Leak & Water Damage Repair
- Maintaining an Aluminum or Metal RV Roof
- Identifying & Repairing Structural Dry Rot