
Installing an RV Solar Panel vrs using a Portable Panel
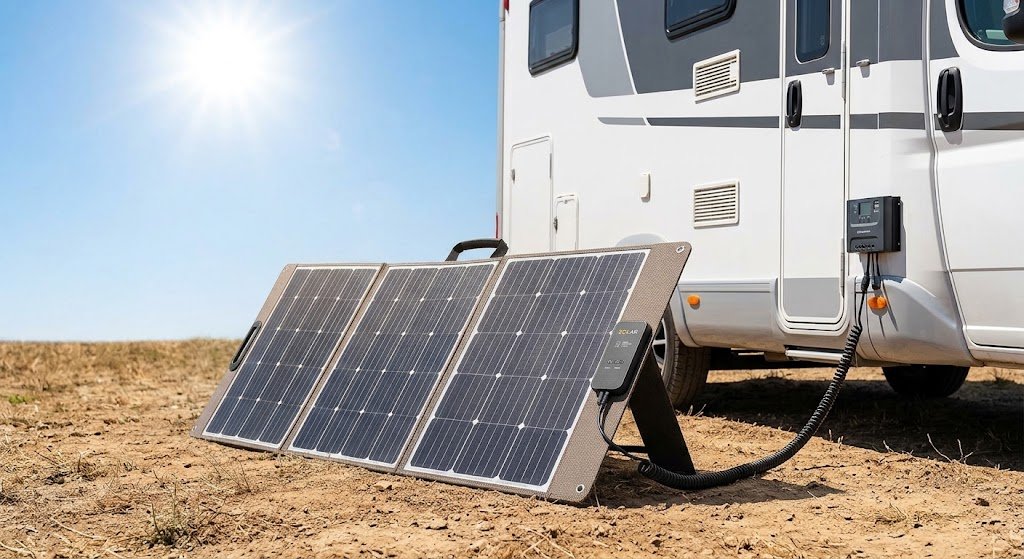
Before drilling into your roof, it is worth considering whether a portable solar panel might be a better fit for your setup. Portable panels give you the flexibility to park your RV in the shade to stay cool while placing the panel out in full sun, and they require zero installation or roof penetrations. The trade-off is convenience and security: portables take up valuable interior storage space, require manual setup at every stop, and cannot be left unattended safely. Permanently mounted roof panels, on the other hand, deliver passive charging whenever daylight is available—even while driving down the highway—keeping your batteries topped up without any extra effort on campsite setup day.
Planning Off-Grid Internet with Your Solar Setup?
If you're upgrading your solar power to work while dry camping, check out our Starlink Mini Setup & 12V DC Power Guide. It explains how to power satellite internet directly from your 12V RV battery bank without wasting precious battery energy through an inverter.
Portable Solar Panels vs. Roof-Mounted Panels
Portable Solar Panels
Pros:
- Shade Flexibility: Park your RV in the shade to stay cool while placing the panel directly in full sunlight.
- Optimized Power: Easily reposition and tilt the panel toward the sun throughout the day for maximum output.
- Zero Roof Drilling: Avoid making holes, applying sealant, or risking potential roof leaks.
- Versatility: Move the panel between different vehicles, trailers, or spots around the campsite as needed.
Cons:
- Manual Setup & Takedown: Requires setup, cable routing, and packing away at every single stop.
- Takes Up Storage: Occupies valuable space inside your RV or storage bays while traveling.
- Theft & Weather Risk: Vulnerable to theft, high winds, or unexpected rain if left unattended outdoors.
Permanently Mounted Roof Panels
Pros:
- Passive "Set & Forget" Charging: Automatically charges your battery bank whenever daylight is available—even while driving down the highway.
- Secure & Out of the Way: Permanently fastened to the roof, keeping your interior storage clear and reducing theft risk.
- Zero Daily Setup: Park your RV and your solar system is immediately generating power without any effort.
Cons:
- Shade Dependency: Parking under trees or shade structures drastically reduces your solar energy output.
- Roof Penetration Required: Requires drilling into the roof, mounting hardware, and careful lap sealant application.
- Fixed Output Angle: Flat mounting reduces peak power generation during early mornings, late afternoons, or winter months.
Installing an RV Solar Panel
Note: many modern RV's are prewired and ready for solar panels - check with your dealer for information.
First disconnect the coach battery and disconnect the shore power cord.
Do not run the generator.
Cover the solar panel face with cardboard to prevent a current from being generated.

Install the panel ...
Find a good mounting location for the panel, face it so that the width end is forward - less wind resistance! The location should be near a logical (meaning an easy) place to route the wiring. Find a place where the panel will not be shaded by roof mounted items. If a tilt mount is being installed ensure that full tilt can be achieved. This panel has been mounted so that the wiring can be run down the refrigerator vent ... a ready made avenue!

Seal all roof mounting points
There are four panel mounting screws that must be sealed ... the wire tie-downs have used the existing screws under the vent cover to minimize the roof penetration points ...

Install the regulator ...
Select a location to install the regulator and display panel. This space above the refrigerator is a "natural" ... it is unused space with no obstructions behind it and close to where the panel is installed. The shorter the wiring runs the better ...

Cut the opening ...
The opening is cut out and the two wires from the solar panel are fed down through the refrigerator vent ... another set of wires is fished down through the refrigerator access compartment to later connect to the battery.

Wiring the regulator ...
The solar panel is connected to the corresponding terminals of the regulator. All connections are clearly marked. Be sure to connect the wires with the correct polarity.

Wiring the battery connection ...
Next, the battery connection at the regulator panel is made. Polarity is important, so double check your connections.

Run the wires ...
The battery connection wires are fed down the refrigerator compartment and then on to the battery using the most direct routing. Remember that in most RVs the white wires are the ground (negative) connections and the black wires are the positive connections. The wiring from the solar panel regulator has a red wire and a black wire. The black wire is the negative wire and is connected to the negative battery terminal. The red wire from the solar panel regulator is the positive wire and it is connected to the positive battery terminal. This may be somewhat confusing at first, but do it step by step and double check everything.

The finished job!
The completed project looks neat and professional!
This project can be completed in an afternoon and will be charging the battery for many trouble free years.