 |
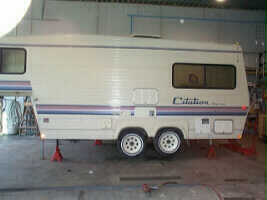
The trailer is jacked
up and placed on jack stands. This allows the axles to hang
freely so that the work can proceed.
Proper equipment is an
absolute must!
|
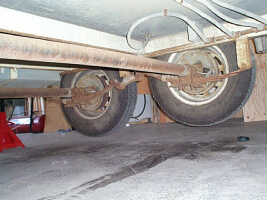
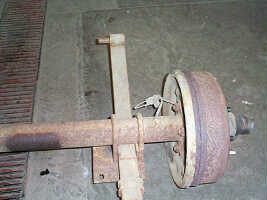
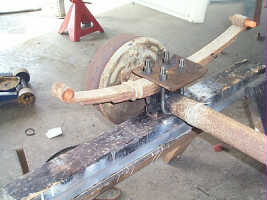
| This is the
original configuration of the axles. The springs are mounted
below the axle tubes. The project is to raise the trailer by
re-positioning the axles so that the springs are located over
the axle tubes thus raising the trailer by 3 to 4
inches.. |
 |
 |
Wheels
removed, ready to go! |
| Bolts removed, axle
is ready to be dropped. |
 |
 |
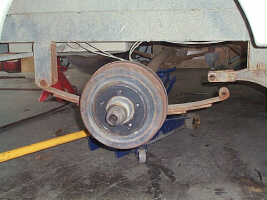
Axle is on
the floor! The bushings will be replaced as they are well worn.
Also, all the suspension bolts are worn and will be replaced at
this time. A heavy duty suspension kit is recommended if most of the parts are worn. Be sure that the parts will fit your particular trailer. |
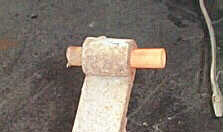
| The new
bushing is being driven in, forcing the worn bushing out the
left side. |
 |
 |
The axle
assembly is placed on sawhorses for easier access. These nuts
are rusted beyond easy removal and the u-bolts will be cut
using a cutting torch to save time. |
| The stripped
axle with the mounting plate and spring removed. The axle is
then flipped over to enable the new saddles to be installed.
This new saddle is ready to be welded into place. An
experienced and certified welder should be the only one to
perform this operation, they know what they are
doing! |
 |
 |
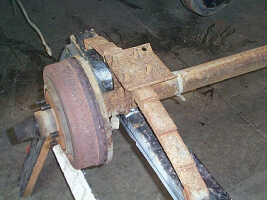
This shows
the spring installed on the new saddle, the plate installed
over the spring and new u-bolts installed to hold everything in
place. (Follow the manufacturers guidelines for torque
specifications) Note the new bushing being inserted in the ends
of the spring. |
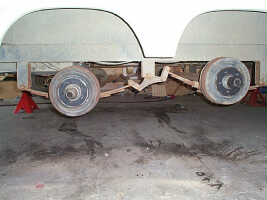
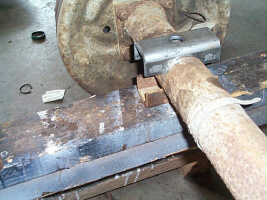
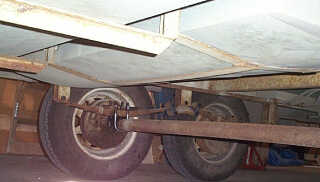
| The axle
re-installed on the trailer. The axle tube is now underneath
the spring but it is in the same relative position as it was
originally. |
 |
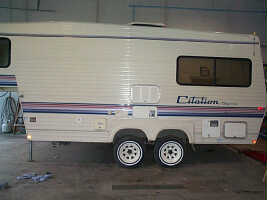 |
The end
result ! This trailer has been lifted about 5 inches with this
procedure and the suspension system has had a much needed
overhaul.
A wheel alignment is recommended after this suspension
modification. |
